

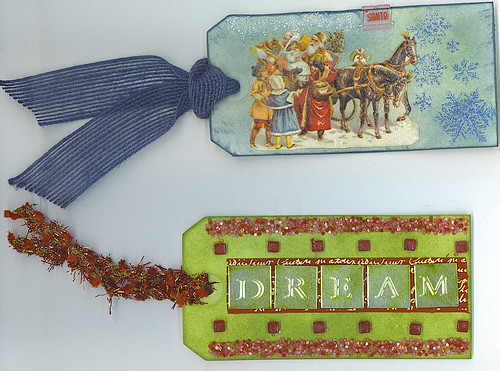
Top tag was inked with Faded Jeans and Peeled Paint Distress Inks, decoupaged with a vintage clip art which in turn was treated with a good coat of Rock Candy Distress Paint, stamped with snowflakes and those embossed with ZING! blue glitter finish embossing powder, edges roughed up and inked heavily, Picket Fence Distress Stickles run in a dripping line on top for icicles, ribbon attached and a little plastic clip adhered.
Bottom tag was well inked with Peeled Paint Distress Ink and then splattered with water droplets, edges distressed and well inked, double stick tape put down top and bottom and Suze Weinberg's Mini Mosaics in Rasberry adhered to tape, 7gypsies red Sommes Gaffer Tape run along center, silver metallic alpha stickers treated with alcohol inks placed on gaffers' tape, and red mosaic stickers run along top and bottom of gaffers' tape.
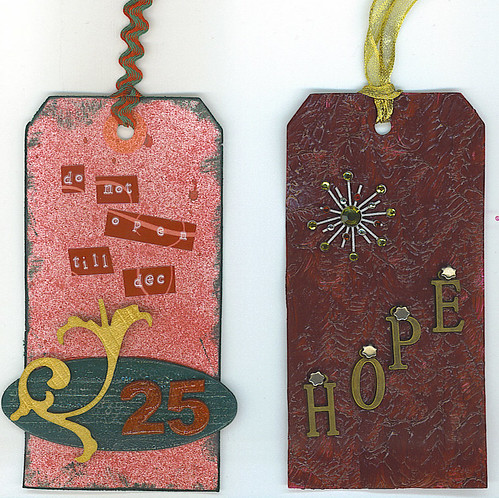
First tag was inked sprayed with Starfish Glimmer Mist, edges distressed and inked directly with Pine Needles Distress Ink, words stamped out on an AroundTheBlock Tapewriter (this thing is a piece of crap, doesn't advance the tape half the time and you have to do it manually, but I bought into a bunch of cool tapes before I knew this, so I use it from time to time lol), and layered with Grungeboard pieces. I painted the oval with Adirondack's Acrylic Paint Dabber in Bottle and then heavily painted it all over when dry with Distress Paint in Rock Candy. The numbers were inked heavily with Faded Brick Distress Ink and also covered with Rock Candy Distress Paint. The flourish shape was just painted with Adirondack's Acrylic Paint Dabber in Gold.
Second tag was painted all over with Plaid FolkArt High Definition Acrylic Paint in Berry Wine. This stuff is truly amazing, a great dimensional paint, you must get some and try it! I used a foam brush (it is a waterbased paint) and after getting a nice thick coating on my tag, just sort of tapped and lifted to get the most dimension from the paint. Make sure it dries thoroughly before continuing, though! This texture is rather bold and can stand on its own, so I kept it simple from here on out. Just added a bejeweled star brad from Karen Foster and some metal alpha embellies attached with star brads.
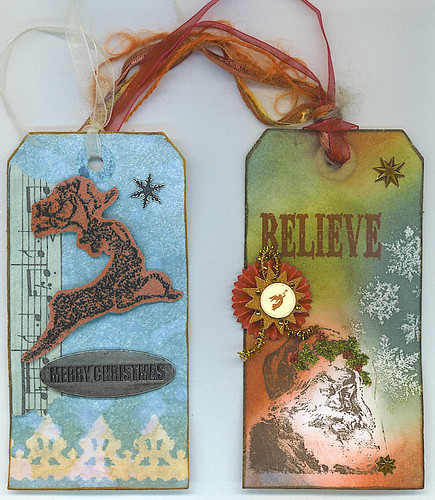
Left tag was first masked with a Tim Holtz Borderline mask and then sprayed with Glimmer Mist. After dry and mask was removed, tag was irregularly inked with Old Paper Distress Ink. Tim Holtz' symphony Tissue Tape was roughly torn and adhered, as was star brad and metal phrase embellie. Lastly, I stamped and embossed Tim's reindeer stamp on Grungboard, inked with Fired Brick Distress Ink, and cut out and attached to tag with dimensional glue dots.
Right tag was first stamped with Santa using Staz-On in black, then inked using various colors of Distress Inks. The snowflakes were stamped using white pigment ink and embossed using a very fine glitter powder. Edges were distressed and inked, bronze star stickers and vintage Christmas rosette sticker adhered, BELIEVE stamped in Fired Brick Distress Ink, and finally Distress Stickles in Peeled Paint and Fired Brick used to embellish Santa's hat.
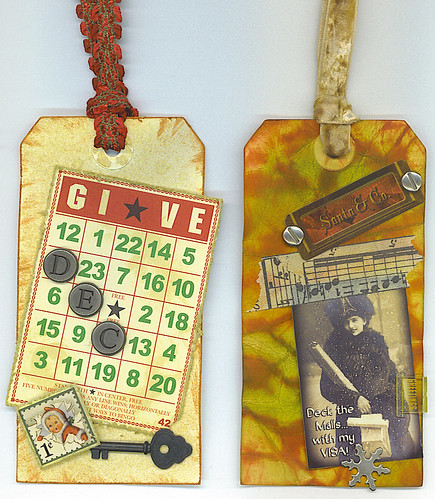
First tag was sprayed with Wheatfields Glimmer Mist and edged heavily inked with Tea Dye Distress Ink. Bingo card edges were heavily distressed - even lost a corner there but that works here! - and inked with Brushed Corduroy Distress Ink before being glued to tag. Metal alphas were also glued on, as was metal key. Stamp clip art was distressed and attached with foam square for dimension. At the end I thought something wasn't right, so I took the Antique Linen Distress Ink and randomly blotched the bingo card to age it. Much better!
Ah, my final masterpiece. I don't even remember which colors of Distress Ink I used, but there were many! First I crumpled up the tag, inked it heavily with Fired Brick Distress Ink, then sprayed with water and let the water move a bit by tipping the tag around. It actually didn't look the way I had anticipated at this point, the red seemed way too dark for what I was thinking. So I went to town and experimented. I ironed it flat when it was dry, then inked up in various colors. I think I used Mustard Seed, Spiced Marmalade, Barn Door, Peeled Paint, Forest Moss, and Faded Jeans. Yeah, lots of color LOL!! I distressed the edges slightly and inked. Attached a vintage clip art piece with the Symphony Tissue Tape, and secured it further with a snowflake brad. Added another clip art piece, attached with two nailhead brads this time. Added a Greetings clip on the side and topped it all off with an elegant crushed velvet ribbon. Oooh la la, la fa la la!!
All these tags were made for the 2010 MJF Christmas Tag Swap. I have three partners so I had to make a bunch!
No comments:
Post a Comment