Friday, December 03, 2010

Christmas Tags 2010, Time Holtz Inspired

How do we love thee T!m, let me show you the ways.....
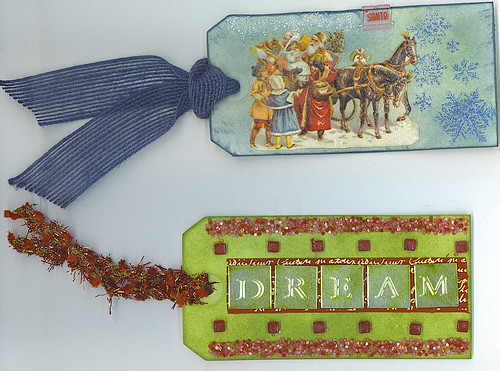
Christmas Tags 2010 A

Top tag was inked with Faded Jeans and Peeled Paint Distress Inks, decoupaged with a vintage clip art which in turn was treated with a good coat of Rock Candy Distress Paint, stamped with snowflakes and those embossed with ZING! blue glitter finish embossing powder, edges roughed up and inked heavily, Picket Fence Distress Stickles run in a dripping line on top for icicles, ribbon attached and a little plastic clip adhered.

Bottom tag was well inked with Peeled Paint Distress Ink and then splattered with water droplets, edges distressed and well inked, double stick tape put down top and bottom and Suze Weinberg's Mini Mosaics in Rasberry adhered to tape, 7gypsies red Sommes Gaffer Tape run along center, silver metallic alpha stickers treated with alcohol inks placed on gaffers' tape, and red mosaic stickers run along top and bottom of gaffers' tape.
Christmas Tags 2010 B

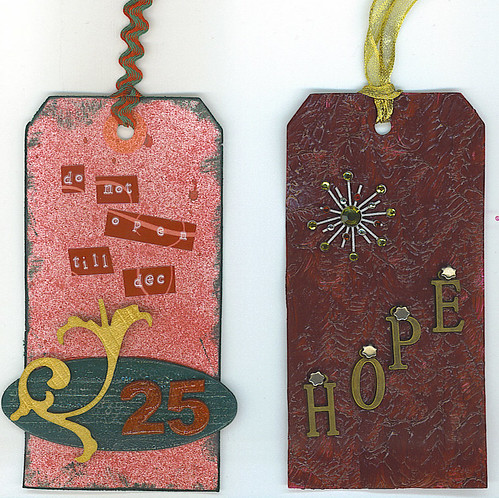
First tag was inked sprayed with Starfish Glimmer Mist, edges distressed and inked directly with Pine Needles Distress Ink, words stamped out on an AroundTheBlock Tapewriter (this thing is a piece of crap, doesn't advance the tape half the time and you have to do it manually, but I bought into a bunch of cool tapes before I knew this, so I use it from time to time lol), and layered with Grungeboard pieces. I painted the oval with Adirondack's Acrylic Paint Dabber in Bottle and then heavily painted it all over when dry with Distress Paint in Rock Candy. The numbers were inked heavily with Faded Brick Distress Ink and also covered with Rock Candy Distress Paint. The flourish shape was just painted with Adirondack's Acrylic Paint Dabber in Gold.

Second tag was painted all over with Plaid FolkArt High Definition Acrylic Paint in Berry Wine. This stuff is truly amazing, a great dimensional paint, you must get some and try it! I used a foam brush (it is a waterbased paint) and after getting a nice thick coating on my tag, just sort of tapped and lifted to get the most dimension from the paint. Make sure it dries thoroughly before continuing, though! This texture is rather bold and can stand on its own, so I kept it simple from here on out. Just added a bejeweled star brad from Karen Foster and some metal alpha embellies attached with star brads.
Christmas Tags 2010 C

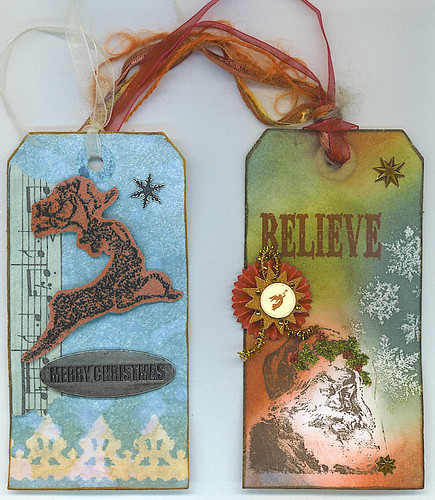
Left tag was first masked with a Tim Holtz Borderline mask and then sprayed with Glimmer Mist. After dry and mask was removed, tag was irregularly inked with Old Paper Distress Ink. Tim Holtz' symphony Tissue Tape was roughly torn and adhered, as was star brad and metal phrase embellie. Lastly, I stamped and embossed Tim's reindeer stamp on Grungboard, inked with Fired Brick Distress Ink, and cut out and attached to tag with dimensional glue dots.

Right tag was first stamped with Santa using Staz-On in black, then inked using various colors of Distress Inks. The snowflakes were stamped using white pigment ink and embossed using a very fine glitter powder. Edges were distressed and inked, bronze star stickers and vintage Christmas rosette sticker adhered, BELIEVE stamped in Fired Brick Distress Ink, and finally Distress Stickles in Peeled Paint and Fired Brick used to embellish Santa's hat.
Christmas Tags 2010 D

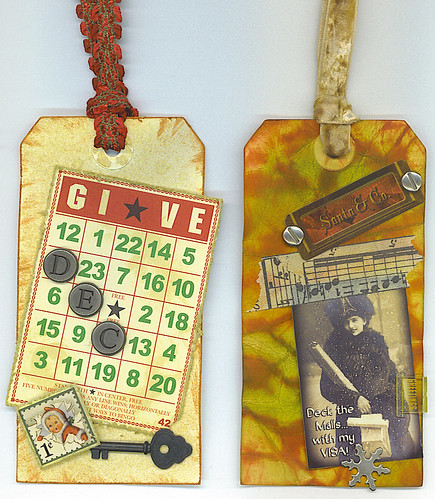
First tag was sprayed with Wheatfields Glimmer Mist and edged heavily inked with Tea Dye Distress Ink. Bingo card edges were heavily distressed - even lost a corner there but that works here! - and inked with Brushed Corduroy Distress Ink before being glued to tag. Metal alphas were also glued on, as was metal key. Stamp clip art was distressed and attached with foam square for dimension. At the end I thought something wasn't right, so I took the Antique Linen Distress Ink and randomly blotched the bingo card to age it. Much better!

Ah, my final masterpiece. I don't even remember which colors of Distress Ink I used, but there were many! First I crumpled up the tag, inked it heavily with Fired Brick Distress Ink, then sprayed with water and let the water move a bit by tipping the tag around. It actually didn't look the way I had anticipated at this point, the red seemed way too dark for what I was thinking. So I went to town and experimented. I ironed it flat when it was dry, then inked up in various colors. I think I used Mustard Seed, Spiced Marmalade, Barn Door, Peeled Paint, Forest Moss, and Faded Jeans. Yeah, lots of color LOL!! I distressed the edges slightly and inked. Attached a vintage clip art piece with the Symphony Tissue Tape, and secured it further with a snowflake brad. Added another clip art piece, attached with two nailhead brads this time. Added a Greetings clip on the side and topped it all off with an elegant crushed velvet ribbon. Oooh la la, la fa la la!!

All these tags were made for the 2010 MJF Christmas Tag Swap. I have three partners so I had to make a bunch!

MJF Christmas Apron Swap

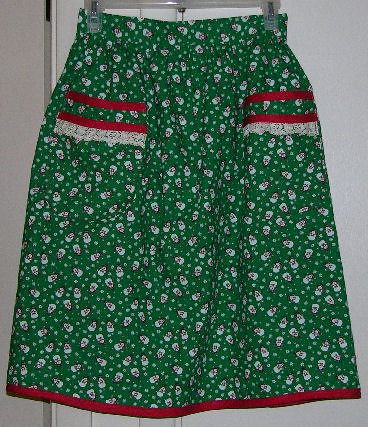
Made this cutie for Patricia, who collects snowmen and has a red and white kitchen. I searched hgh and low for red and white snowman fabric at my local store, but to no avail. I think that's OK, as this will give that kitchen some festive contrast. Besides, this is one of those nice vintage calicos that are much sturdier than the ones made these days, yet still has a nice drape and isn't too stiff like the lighter home dec fabrics often used for aprons:

XmasApronSwap2010

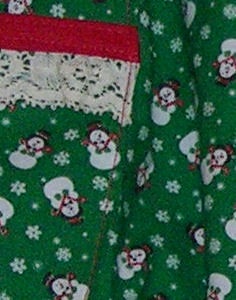
And here's a close-up of the pocket corner so you can see those cutie patootie snowmen better:

SnowmanCLoseup

And yes, ahem, I AM aware that I am making a boat load of posts today. I do not seem to be able to get on regularly with my schedule and all, so I am doing what I can do. I rather do group postings, blocking each topic into another post, than not post at all. I also find that sometimes I am ready to post, pics are all ready and everything, but I am waiting to make sure a recipient has received their giftie before I make it public. By the time I know it has been received, I forget to post!! So bear with me and my feast or famine postings.

Duck Tape Adventures

I know everyone else has been riding the duck tape train for years, but I have only recently taken a ride and I must say that I love the rails! Cheap tickets, meandering routes, and scenic views. Happy happy joy joy!!

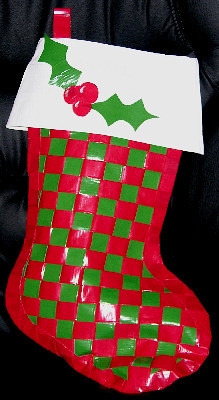
First I started with some woven Christmas stockings:

ducktapestocking

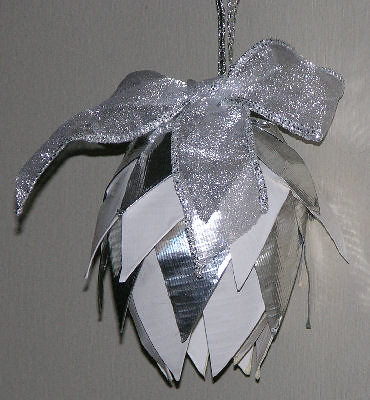
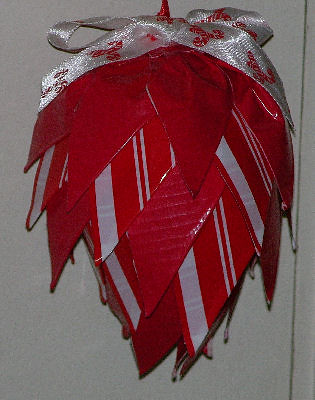
These were real easy and didn't take too terribly long to make, though some time was involved. I actually saw one pictured in the 2010 Joann Fabrics Christmas catalog, and they said instructions were available online, but there were no instructions available so I just made it up as I went (after a nasty note to corporate for their false advertising! they said they would get around to fixing the issue but whatever, I wasn't about to be thwarted by duck tape). I just made non-sticky tape "ribbons" by folding lengths of tape, stick side to sticky side, then weaving those ribbons to create the stocking front. It helps to use strips of blue painters' tape to keep the top and bottom tape strips in place while weaving. For the back, I made a red tape fabric and cut both front and back out in a stocking pattern. Again I used painters' tape, making a large X through the front weaving, to hold it all together while I cut (this was easy to carefully remove from the inside of the stocking when I was all done). I attached front and back using red tape as a seam binding of sorts, then made a white tape fabric cuff and just taped that to the top inside of the stocking. Decorations of holly leaves and berries (highlighted with a silver metallic sharpie!) completed my beauty. These were very well received at both work and within the family - my dear aunt even tried to claim a couple for her own! I didn't let her get away with it, as I used those first two for MJF Christmas swaps, but I did let her abscond with my very first duck tape Christmas ornament. I got the idea for this from the roses folk make from duck tape - they sort of start with a square that's folded into a triangle and a small sticky side is left to adhere the petal to the rose. I just overlapped those triangles, sticking them to a styrofoam ball instead of to each other. The result is smoother than the roses, and I think the result resembles a pinecone. My first was a rather elegant inspired silver and white. Take a look-see:

DSCN2111

Isn't that pretty? My aunt has rather old-world elegant decor tastes, so it suites her just fine. And she feeds me real good food a lot, so she can get away with a lot of crafty absconding LOL!


I have made quite a few of these since then, trying out different color themes and such. Been using a lot of coupons at the craft store on duck tape! Here's my second, though. I love how it looks, very Christmas-y. Though the unevenly striped candy cane tape is not duck tape per se, it IS made by Duck brand, and it is rather cute, so I used it anyway. Worked fine, too. It's a sort of seasonal packaging tape:

DSCN2114

I have moved on for the time being, from stockings and ornaments to table decor and purses, but that will have to wait till later. Their are Christmas recipients out there who I want to surprise!!

Brown Button Reindeer Swap

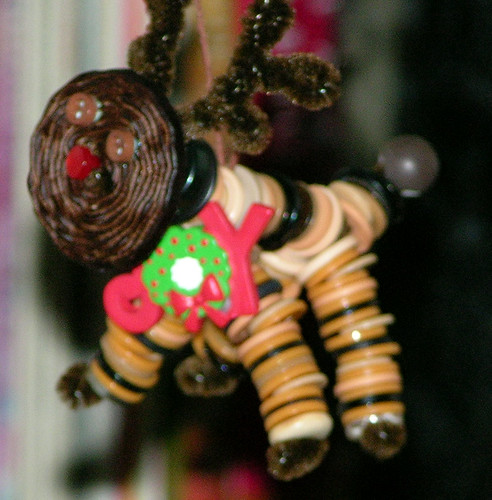
This MJF swap was my nemesis, my own personal albatross! For some reason, I just couldn't get my creative mojo in order. Talk about block!! I had ideas that I just couldn't bring to fruition, so I finally gave in and did one of these guys the exact same way everyone else did them. Sigh. Conformity just isn't my thing. This pagan soul has never walked the way of the masses, baby....

Button Reindeer

First Christmas Card for 2010

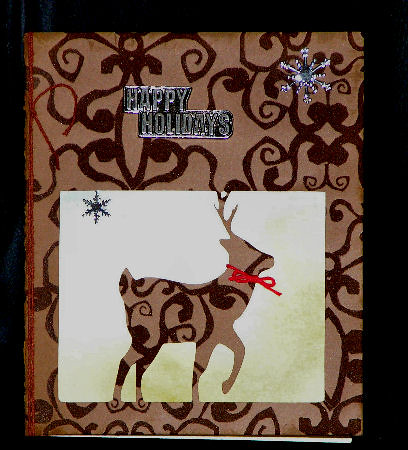
I threw this one together rather quickly, as it was just a little note to put in a stuffed stocking swap over at MJF. I adore reindeer and think this cutie came out nice:

xmas card 2010

November Mailart

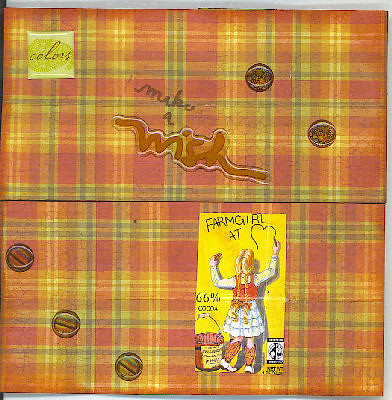
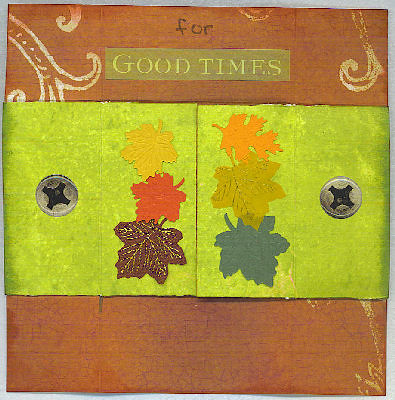
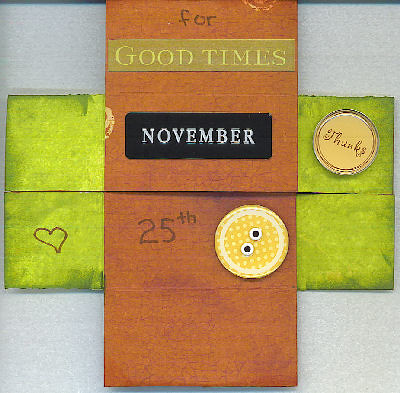
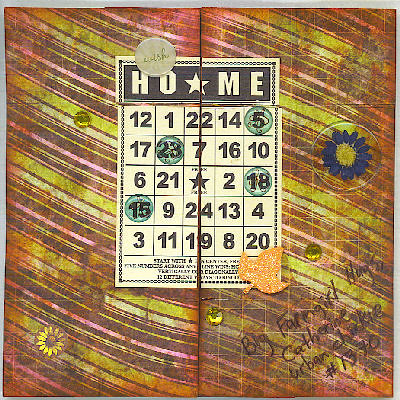
OK, so this is rather old at this point but I was waiting to hear that the recipient got it. This was my first attempt at a never-ending card and I love this technique, there are more of these in my future! Here it it, as each unfolding reveals the next layer:

NovMailart1

NovMailart2

NovMailart3

NovMailart4